Soyrizo – spicy vegan sausage-y crumbles

Soyrizo

I’ve recently discovered TVP or textured vegetable protein and I’m both intrigued and delighted.

I’ve resisted using TVP because I thought it would taste dry and bland. And you know what? It is dry and bland. So is flour until you do something with it.

TVP is also genius. It’s made from defatted soy flour, a by-product of extracting soybean oil. TVP is high in protein and fibre, it costs next to nothing (I bought a three-cup bag of dried crumbles for 75 cents!) and it’s versatile.

I have only begun to experiment with this amazing ingredient. The first big hit is soyrizo – my vegan version of spicy chorizo sausage crumbles.

I’ve been adding soyrizo to chili (recipe coming soon)

chili.jpg

And to nachos and pizza and spaghetti sauce.

nachos.jpg

I’d love to hear how you plan to use soyrizo.

Soyrizo ingredients.jpg

Ingredients

1 cup TVP

7/8 cup boiling water or vegetable bouillon (that’s 1 cup of water with two tablespoons of water removed)

1 tsp vegetable bouillon powder, if you’re not already using vegetable bouillon

1 tsp salt

½ tsp smokey paprika

1/4 tsp cayenne pepper

2 tsp chili powder

Directions

Mix all the dry ingredients in a heat-proof bowl, mug or jar. Pour the boiling water over top and stir the moistened crumbles. Let sit for five minutes before using, or store in the fridge for up to four days.

REALLY green iced tea – no matter the colour

tea1.jpgIt’s been a hot summer and I’ve been craving quenching, cold drinks that don’t break the bank or the environment. Homemade iced tea to the rescue!

I make my own iced tea using different combinations of rosehips, loose green tea, and hibiscus flowers. The results are wonderfully healthful, flavourful and by using my own, reusable cup and metal straw, very very green indeed.

Green tea is said to be one of the healthiest sips in the world. It’s been proven to provide

tea3.jpg

Rosehips on the left and loose green tea on the right

Rosehips are the fruit of a rosebush. These little pods can be collected after the first frost in the fall and have a mildly fruity taste. Rosehips are loaded with vitamin C and antioxidants.

Hibiscus are the flowers of the hibiscus plant. Hibiscus tea tastes more fruity than flowery and mildly astringent, which makes it thirst quenching. Hisbiscus tea has cholesterol- and blood-pressure-lowering properties.

tea hibiscus.jpg

Dried hibiscus flowers

Put all together or in any combination, green tea, hibiscus and rosehips pack a potent punch of health benefits. More importantly though, they make a delicious, affordable and healthy iced tea.

Here’s how to make a pitcher of my iced tea.

Ingredients for a rosehip-green-tea

1/3 cup dried rosehips

2 Tbsp green tea leaves

5 cups boiling water

Sugar or agave syrup (optional and to taste)

hibiscus tea close.jpg

Rosehip-green-hibiscus tea. 


Ingredients for a rosehip-green-hibiscus tea

1/3 cup dried rosehips

1 Tbsp green tea leaves

1 Tbsp hibiscus

5 cups boiling water

Sugar or agave syrup (optional and to taste)

Directions

Combine the rosehips, green tea and hibiscus and water in a heat-proof jar or pitcher (you don’t want to use something that will crack from the hot water, or the temperature changes).

Let the tea steep for at least 4 hours in the fridge. Serve on its own or with ice. Add sugar or agave syrup if you want a sweeter tea.

Serve up and enjoy!

*From: draxe.com/benefits-of-green-tea/

Easy, tasty roasted eggplant curry

Eggplant curry far.jpg

Every once in a while, I’ll get cravings for fruits and veggies that don’t otherwise hit my radar. This week, the craving was for eggplant. So, I made a super easy, flavourful but not spicy-at-all curry. The recipe is pretty much effortless and the end result is so satisfying!

Let’s get started.

Eggplant curry close.jpg

Ingredients

600 g (about 1 ½ pounds) baby or Japanese eggplants, cut into coins. I used three Japanese eggplants.

up to 1 tsp salt (divided)

½ tsp pepper

3 Tbsp neutral-tasting oil (I used peanut oil)

2 onions peeled, cut in half and then thinly sliced

2-3 cloves garlic minced

1 tsp turmeric

½ tsp cayenne pepper

2 tsp ground coriander

2 tsp garam masala

1 tsp sugar (any kind but make sure it’s vegan)

397ml can roasted, diced tomatoes

397ml can coconut milk

Juice from ¼ of a lemon

Optional – ½ to 1 cup cooked lentils

Eggplant curry

Directions

Heat your oven to 400F (200C) and place the sliced eggplants on a cookie sheet. Drizzle with 2 Tbsp of the oil. Sprinkle with pepper and salt. Bake for 20 minutes until the eggplants are golden.

You can bake the eggplant ahead of time – even the day before – and store in the fridge in a sealed container.

In a medium-sized pot that has a lid, sauté the onion in the remaining 1 Tbsp oil on medium heat for about 5-7 minutes. You want the onions to be soft and starting to turn golden. Add the garlic, salt, all the spices, sugar and lemon juice, and heat through.

Turn the heat up to high and add all the remaining ingredients. Bring the pot to a boil then reduce to a simmer. Simmer for 15 minutes with the lid on, then 5 minutes uncovered to let the sauce thicken.

Serve with basmati rice and enjoy!

This dish makes 4 servings and freezes well.

Hail pre-made seitan for quick, easy meals


seitan combo

Both these dishes were made from the same basic ingredient – seitan.

This has not been my best summer. My little cat, Molly, has been extremely ill and I’ve been to-ing and fro-ing daily to the vet after work to visit with her and feed her dinner. On top of that I was tossed on the city bus by a race-car-wannabe driver who left me lamed up and in pain with a smashed ankle. The good news – I’m healing nicely and so is Molly who has received the best of veterinary care.

Last week, my friends, Stephanie and Britton, announced their new business – The Seitanists. They make the most delicious seitan, vacuum sealed and frozen, ready to use as a super easy and fast meal ingredient. Stephanie asked me to try out their seitan and see what I thought.

What I thought is buying already-made seitan is a genius idea for busy people. It was a great solution for me with my full schedule and inability to stand for any amount of time.

I used The Seitanists’ cutlets to make two very different dishes – a spicy stir fry and pan-fried schnitzel medallions.  Check it out.

Seitanic stir fry with a hot, five-spice marinade

closer (2) - Copy.jpg

For this stir fry, I cut one of the pre-made seitan cutlets into strips and marinated them for a couple hours. I then stir fried the strips and all the marinade with sliced onion, bell pepper, mushrooms and snow peas and served over rice.

Here’s the recipe for my marinade, which is more than enough to marinate a cup of seitan strips and nicely coat four cups of vegetables and rice.

really close.jpg

1 Tbsp paprika

2 teaspoons garlic powder

1/2 tsp cayenne powder

1 tsp five-spice powder

4 Tbsp tamari or soy sauce 

2 Tbsp cooking sherry 

2 Tbsp agave

 1 Tbsp sesame oil

Seitanic schnitzel medallions

Schnitzel close.jpg

Making these little schnitzel medallions could not have been easier. I cut the seitan cutlet into medallions, dredged them in flour seasoned with salt and pepper, dipped them in almond milk and then covered them in mix of 1/2 cup panko crumbs, two tablespoons flour and two tablespoons nutritional yeast.

I pan fried the medallions in vegan margarine on medium heat until both sides were golden and crispy, then served the medallions with lemon wedges, a pink potato salad (add some beets to your regular potato salad) and sauerkraut. My German mother would have loved this.

pink shchnitzel plated.jpg

Hail seitan! This amazing, versatile ingredient is inexpensive, easy to work with, delicious, versatile and good for you. Thanks to ready-to-use seitan from The Seitanists, there’s no excuse ever for me not to be able to have a great meal in less than 30 minutes.

Make it your way salad with an east Asian vibe

Whole bowl.jpg

The gardens are just starting to offer up fresh lettuces, radishes and even some peas here. While I’m not generally a huge salad fan, it’s impossible to resist all this garden goodness.

Here’s what I had for lunch today – a big green salad with Gardein chick’n strips and a sesame and soy sauce-based dressing.

Here’s the recipe for this quick and flavourful dressing.

1 ½ Tbsp soya sauce

1 ½ Tbsp sherry

1 ½ Tbsp agave nectar

1 ½ Tbsp rice vinegar

1 Tbsp sesame oil

I  ½ Tbsp neutral flavoured oil (I used peanut oil)

2 -3 green onions finely chopped

Mix all the ingredients in a jar or small bowl or mug. This recipe makes lots of dressing – enough to dress a whole head of lettuce plus extra veggies. I like mixing my dressings in a jar with a lid so I can store any leftovers easily in the fridge.

Closeup.jpg

Tailor up the salad portion anyway you want. Mine has:

Bibb lettuce

Sliced navel orange

Radishes

Mushrooms

Freshly shelled peas

Other salad additions that would work well with this dressing are: broccoli, green beans, snap peas water chestnuts, carrots, cabbage, kohlrabi, red pepper, bean sprouts, celery, mango

closerup.jpg

Add some toppings

I topped my salad with Gardein chick’n strips and toasted almonds. The toppings add oomph and flavour but use them as a garnish, not the bulk of your salad.

Other toppings that would work well with this dressing are: plain baked, crispy tofu,  plain, firm tofu,  seitan, edamame, toasted sesame seeds, sunflower seed, uncooked ramen noodles, cooked rice or mung bean noodles, avocado

This salad is totally customizable. Mix and match ingredients, add as much or as little of whatever as you like. That’s the beauty of cooking from scratch.


Blueberry banana muffins with a surprise inside

jammy muffin

I had some waaaaay overripe bananas to use up but was too impatient to make banana bread – that takes 45 minutes to bake in the oven. So, instead I opted to make mini muffins. These little cuties are moist and delicious and nutritious thanks to chickpea flour, bananas, blueberries and walnuts. I put a little jam centre in some of them for an extra gooey, delicious surprise. Best of all, these muffins are super easy to make. Like right now. Make them now.


open jammy muffin


Jammy!


Dry ingredients

2/3 cup flour (whole wheat or white)

1/3 cup chickpea flour (if you don’t have this, you can just use a full cup of flour)

½ cup cornmeal

½ tsp salt

1 tsp baking soda

1 cup blueberries tossed with 1-2 tsp flour to coat them. The flour coating stops the blueberries from leaking blue in the batter.

¼ cup chopped walnuts

Wet ingredients

2 very ripe bananas mashed

¼ cup coconut oil melted

1 tsp vanilla

¼ cup agave nectar

1 cup plant-based milk (I used almond milk)

1 tsp apple cider vinegar

 Optional – raspberry, cherry, strawberry or other flavour jam


open muffin no jam

I made some of the muffins without jam and they were still moist and delicious.


 Directions

Pre-heat your oven to 350F. Grease a mini-muffin tin, a regular muffin tin or a loaf pan. This recipe will make 18 mini-muffins, 6-12 regular muffins (depending on the tin size) or one loaf.

In a medium-sized bowl, mix all the dry ingredients. Sift in the baking soda so you don’t have any weird crystal lumps in your final mix.

In a separate bowl, mix all your wet ingredients EXCEPT the jam, if using.

Mix the wet ingredients into the dry ingredients and stir to incorporate everything and make a batter. You don’t need to stir a lot or vigorously – just combine everything.

If you’re going with a jam-less muffin, at this point you can simply fill your baking pan. Don’t overfill the tins since the muffins will puff up.

If you’re going to add jam, fill your muffin tins just half way full. Then add a dollop of jam – a true measured teaspoon full. Cover with batter so the jam is hidden inside.

If you are making a loaf, then fill the loaf pan with half the batter. Spoon on jam in a strip down the middle of the batter and cover with the remaining batter.

Depending on the size and shape of your pans, here are your baking times.

Mini-muffins – 25 minutes

Regular muffins – 25-30 minutes

Bread loaf – 45-50 minutes.

The muffins are done when they are golden on top and a fork or toothpick inserted in them comes out clean.

Allow the muffins to cool in their pan for 10 minutes or so and then serve them up! These beauties also freeze well and make great snacks or breakfast on the go.

Curried rice and lentil salad with grapes and celery

close up.jpg

If the Waldorf-Astoria merged with the Best Marigold Hotel, this would be the new hotel’s signature dish. This salad, which eats as a meal, combines flavourful Indian spices, the crunch of celery, the sweetness of grapes and the staying power of lentils and rice. It’s also an easy dish to make that will last for 3-4 days in the fridge and travels well, which makes it great for toting for lunches, picnics or pot lucks.

Ingredients

ingredients.jpg

The salad

2 ½ cups cooked brown rice (that’s about 1 cup uncooked)

1 cup of cooked du Puy or beluga (a/k/a black) lentils (about ½ cup uncooked)

2 green onions sliced

2 stalks of celery sliced

1 ½ cups red grapes cut in half

¼ cup slivered almonds toasted*

The dressing

The juice of 1 lemon

4 Tbsp canola or peanut oil**

1 Tbsp curry powder

½ tsp cumin

½ tsp turmeric

3 – 4 cloves garlic minced

¾ tsp ground ginger

¾ tsp salt

rice super close.jpg

Directions

Place all the salad ingredients in a large bowl. In a cup or small bowl, whisk all the dressing ingredients and pour over the salad. Toss everything thoroughly to combine. I like this salad after it’s had time to sit and the flavours can marry. I usually make it in the morning for lunch.

Serve up and enjoy!  This makes 3-4 servings.

*To toast the almonds, place them on a small cookie sheet or other heat-proof dish (I used a miniature casserole dish). Place the almonds in the oven (To save power, I use my toaster oven.) at 400F for 3-4 minutes. Seriously keep your eye on them! They can burn in a flash. Remove the almonds from the oven as soon as they are toasted or they’ll keep cooking.

**Use an oil that is flavourless and will not go solid (like virgin coconut oil does). I tried this salad with melted coconut oil once and the minute the oil got cold, I was left with unappetizing mini-chunks of “oil” throughout the salad.

Isa’s Goddess Pasta a/k/a Tahini Linguini

n

goddess pasta 2.jpg

I think I have a girl crush on Isa Chandra Moskowitz. Or I should say a goddess crush because she is a kitchen goddess extraordinaire. Every recipe of hers that I’ve tried, I’ve loved. Here’s the latest – Goddess Pasta or as I am calling it, tahini linguini because if that not the name of a new Muppet, I don’t know what is.

Anyway… about this recipe. Isa promises it’s so ridiculously easy that she almost left it out of her cookbook, “Isa Does it”.  I’m glad she didn’t. This recipe IS(a) fast and easy. And despite what I thought was a lot of garlic and green onion (or chives), the dish is mild yet flavourful and creamy, crunchy and satisfying. I ate this dish hot, but I think it would even be great cold. So, without further ado, here’s how I made Isa’s Goddess Pasta. If you want to make it the way Isa does it, buy the book!

ingredients.jpg

Ingredients

12 oz linguini

The juice of 1 lemon

1 ½ cups cooked chickpeas (a 15 ounce can)

1 bunch broccoli cut into bite sized pieces. I also peeled the stem and sliced it up.

3-4 spring onions chopped finely

4 cloves garlic minced

2 heaping tablespoons nutritional yeast

1 tsp salt (I don’t salt my pasta water)

A few grinds of pepper

½ to 2/3 cup tahini (I didn’t measure exactly!)

½ cup hot water (I used the water from the boiling pasta)

1 Tbsp olive oil

goddess pasta.jpg
Directions

Boil the pasta according to the package directions. While the pasta is boiling, prep the sauce and other ingredients.

In a large bowl, blend together the green onion, lemon juice, salt, tahini, nutritional yeast, hot water and ground pepper. You will have a thickly creamy dressing. If the dressing is too thick, add more water.

In a large wok or frying pan, heat ½ tablespoon olive oil and sauté the garlic until it’s golden. Add the garlic to the sauce mixture.

Add the rest of the olive oil to the pan and heat. Add the broccoli and stir fry until the broccoli is bright green but still very crunchy.  Add the broccoli to the sauce mixture and add the chickpeas.

Once your pasta is cooked, drain it and add it to the bowl with the rest of the ingredients. Toss everything to combine and serve up. Enjoy!

This recipe makes 4 servings.

p.s. I think next time I may even add some shredded carrot and julienned red pepper for extra colour.


Easy vegan, almond-almond cookies

almond almond cookie 2.jpg

I recently bought “Isa does it” by Isa Chandra Moskowitz – it’s a recipe book chockablock full of delicious, doable vegan recipes. One of the first that I tried was her lemon-lemon cookies. They’re pretty much like crack. It’s impossible not to eat them all immediately and then crave another batch.

But I also happen to love almonds so I wanted to see if I could recreate Isa’s lemon-lemon cookies but with an almond flavour. And yup, I did it. These cookies are rich, nutty, chewy, crunchy and just as addictive as the lemon-y originals And, because there’s no lemon rind grating involved, these cookies are kinder on my knuckles too.

Let’s get started.

Ingredients

For the cookies

½ cup coconut oil melted

¾ cup white sugar

3 Tbsp almond flour– toasted*

½ tsp almond extract

½ tsp vanilla extract

3 Tbsp almond milk

1 ½ cups flour

½ tsp baking powder

1 tsp cornstarch

For the icing

1 cup icing sugar

1/2 tsp almond extract

½ Tbsp melted margarine

1 Tbsp almond milk

almond almond cookie 3.jpg

Direction

*To toast the almond flour, place it on a small cookie sheet or other heat-proof dish (I used a miniature casserole dish). Place the flour in the oven at 400F for two minutes max. Not kidding – not one minute longer or it will burn! Remove immediately.

I have a toaster oven so I toasted the almond flour in the toaster oven. If you used your regular oven, turn the heat down on the oven to 350F. You may need to leave the oven door open for a minute to get the heat to drop.

In a medium sized bowl, mix the sugar, coconut oil, almond extract, vanilla extract, and almond milk together until they are combined. Add the toasted almond flour and stir to combine. Sift in the cornstarch and baking powder and then add the flour and stir to combine.

Use a teaspoon to drop the cookie dough in mounds onto the cookie sheet. You can use the back of the spoon or your fingers to flatten the cookies down slightly. I can get 15 cookies from this recipe.

Bake at 350F for 10 to 12 minutes until the edges of the cookies are golden.

Let the cookies cool completely on the cookie sheet, then transfer to a plate or cooling rack so you can drizzle on the icing.

To make the icing, combine all the icing ingredients in a small bowl or cup. The icing will be drizzly. Use a spoon to pour over the cookies, and while the icing is still wet, sprinkle on any garnish you might want or leave plain.

Let the icing set and serve up! Enjoy.

icy snuggle.jpg

It’s been a stormy, icy weekend here and almond-almond cookies, a good book and some kitty snuggles made it really quite perfect.

Isa Chandra’s dilly stew with dumplings

Stew close.jpg

I have never eaten stew with dumplings but when I saw the recipe and enticing photo in Isa Chandra’s cookbook Isa Does it, I had to make them. At first I wasn’t sure what to think of these little fluffy lumps of dough floating in a savoury stew but my tummy figured out pretty quickly that this was a great thing. Isa’s recipe takes about one hour from start to finish and is really very straightforward. I embellished a little by adding extra veggies, but essentially this is how Isa does it.
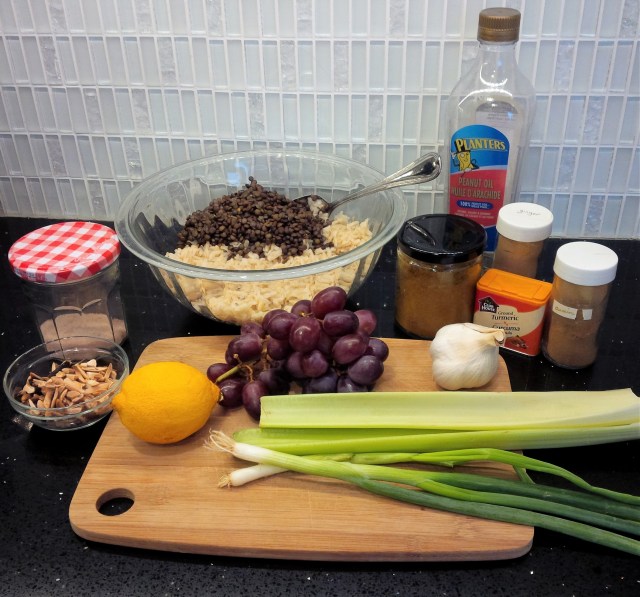
Stew ingredients.jpg

Ingredients

For the stew

3 Tbsp vegan margarine

¼ cup flour

1 medium onion diced

3 cloves garlic minced

6 cups vegetable broth

1 tsp salt

A few grinds of black pepper

2 ribs celery

2 carrots cut into coins or half moons

1 ½ cups cooked navy beans (that’s a 15oz can drained and rinsed)

1 ½ pounds Yukon Gold potatoes cut into chunks (2 medium potatoes)

½ cup frozen or fresh peas

½ cup cremini mushrooms chopped

1 tsp dried thyme (or 1 Tbsp fresh)

2 Tbsp fresh dill (or 2 tsp dried – but seriously try to get fresh for this one)

½ tsp paprika

1 Tbsp vegan Worcestershire sauce

For the dumplings

1 ½ cups flour

2 teaspoons baking powder

½ tsp salt

1 tsp dried rosemary (or 1 Tbsp fresh finely chopped) OR 1 tsp poultry seasoning

¾ cup unsweetened plant milk (almond, soy etc)

2 Tbsp olive oil


Directions

Melt the margarine on medium heat in a large, wide pot that has a tightly fitting lid. Add the flour and heat through to make a soft roux – stir constantly for a couple minutes to cook out the raw flour taste but without burning the roux. Add the onions and garlic and sauté together for about 5 minutes.

Add the broth and stir constantly using a whisk so that the flour is incorporated evenly and lump free.

Add all the other ingredients and bring the pot to a boil. Once it’s boiling, reduce to a simmer and simmer for 25 minutes. Stir a few times during cooking. The stew is done when it’s nicely thickened and the potatoes and carrots are easily pierced with a fork.

While the stew is simmering, make the dumpling batter.

In a small bowl, sift in the dry ingredients. Okay, not going to sift? At least sift in the baking powder so you don’t end up with salty, crystalline lumps in your batter. Make a well in the dry ingredients and add the wet ingredients. Stir everything to combine – you will have a rather ugly looking batter and that’s okay.


dough

It’s not pretty, and I was very dubious about this whole dumpling thing at this point.


When the stew is done simmering, drop the batter by spoonfuls on top of the hot stew. I got 16 dumplings that completely covered the top of the stew.

Put the lid on the stew pot and let the pot simmer for another 14 minutes. No peeking! It’s the steam in the pot that cooks the dumplings. They will puff up and be nice and firm to the touch when they’re cooked, but will be cakelike on the inside.


pot of dumplings.jpg

Here are the dumplings after steaming. At this point I was REALLY wondering what I had done. But ladle up a dumpling and some stew on top, dig in and it’s savoury heaven!


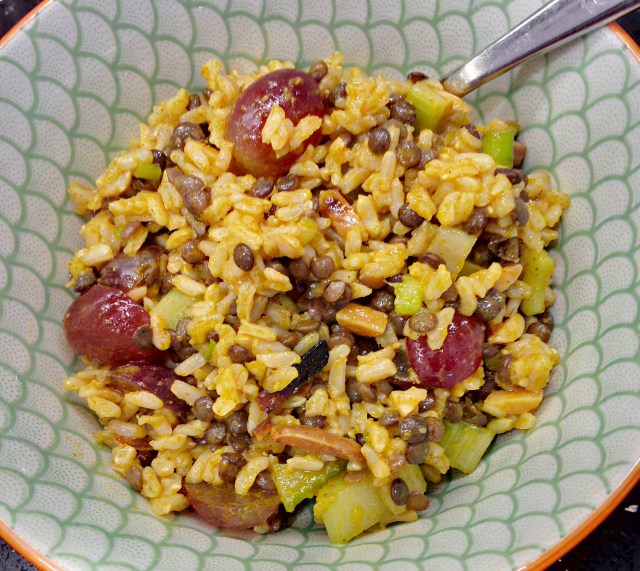
Ladle the stew and dumplings out in a bowl. This dish makes 4 very satisfying servings and will last up to 3 days in the fridge. It makes great, microwavable leftovers.


Dumpling stew

You end up with this, and this is DELICIOUS!
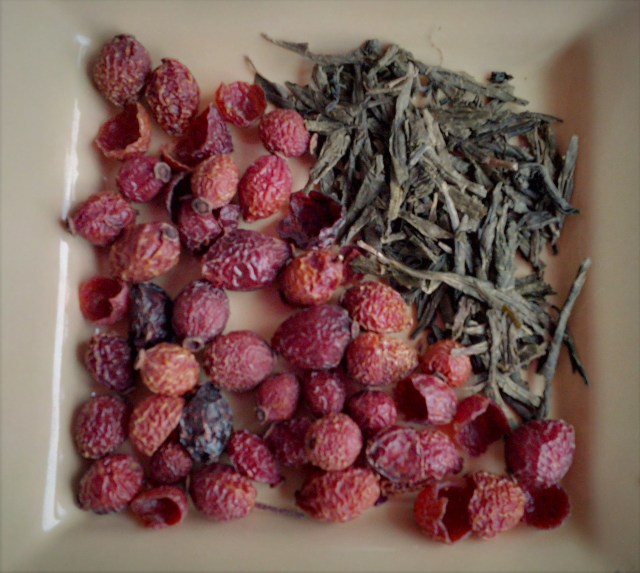