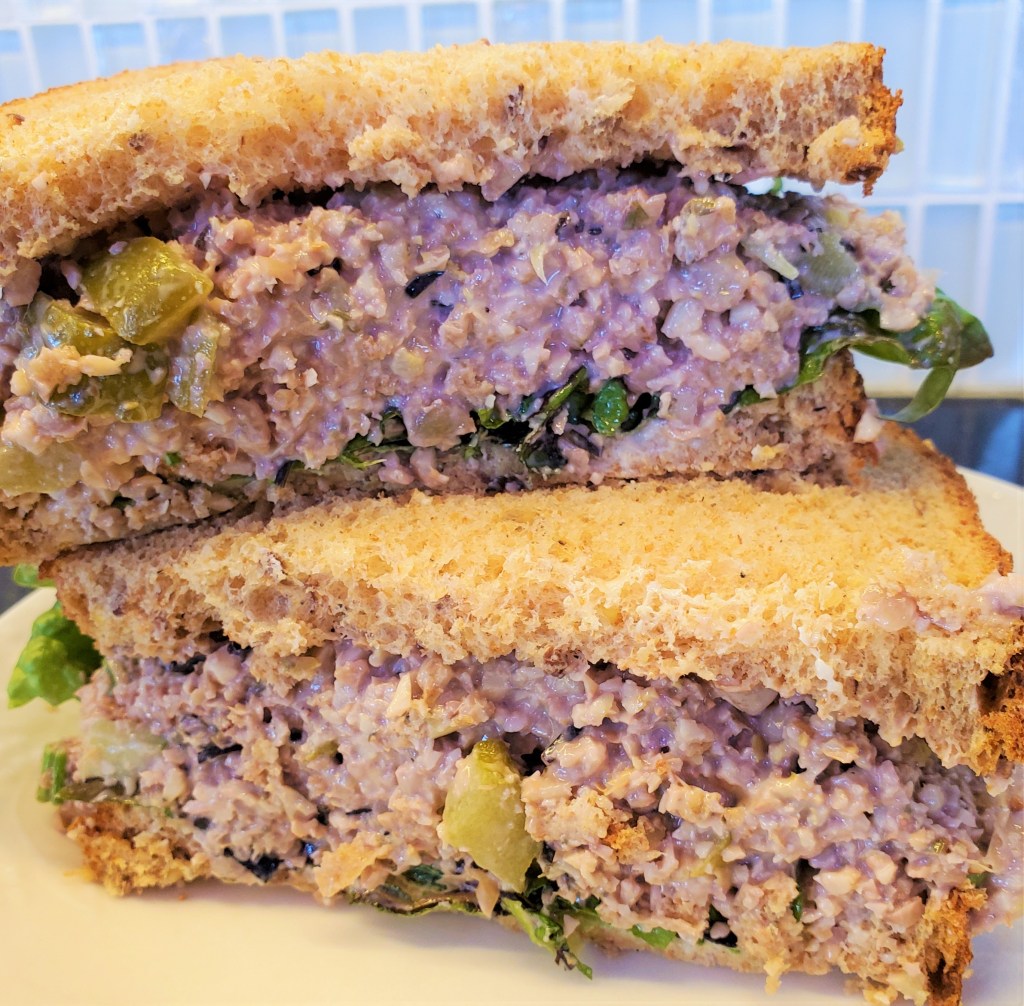
A vegan tuna salad that checks all the boxes

Pre-vegan days, I loved a tuna-salad sandwich.  It was such a great comfort food. I tried making vegan tuna-salad using chickpeas to replace the tuna. It was good. But it was nothing like tuna salad. I recently discovered a recipe that uses nuts and seeds to replace the tuna. And you know what? It’s amazing! This is my version of that recipe. This tuna salad is:

  • Vegan
  • Gluten free
  • Soy free
  • Spreadable yet pile-high-able
  • Nutrient dense
  • Delicious
  • Tuna-y without any actual marine life being hurt. Yay!

You will want to presoak the nuts and seeds for at least 30 minutes so you need to plan ahead a bit. You also need a food processor or good blender for this recipe or super cheffy knife skills.

This recipe makes enough for about 4 very full sandwiches.


Ingredients

1/2 cup walnut pieces

1/4 cup raw sunflower seeds

1/4 cup raw pumpkin seeds (a/k/a pepitas)

1/2 tablespoon dried seaweed (I used sea oak, also called arame)

The juice of ½ lemon

1 tablespoon brine from dill pickles

1 stalk celery chopped

1 green onion chopped

1 dill pickle chopped

½ cup vegan mayonnaise (I use Hellman’s)

1 generous teaspoon prepared horseradish (optional)

Salt and pepper to taste
Directions

Soak the walnuts, sunflower seeds, and pumpkin seeds in water. You want to soak them for 30 minutes to an hour. I find longer soaking makes everything too mushy. I soaked the nuts and seeds right in the food processor, then just drained off the water.  

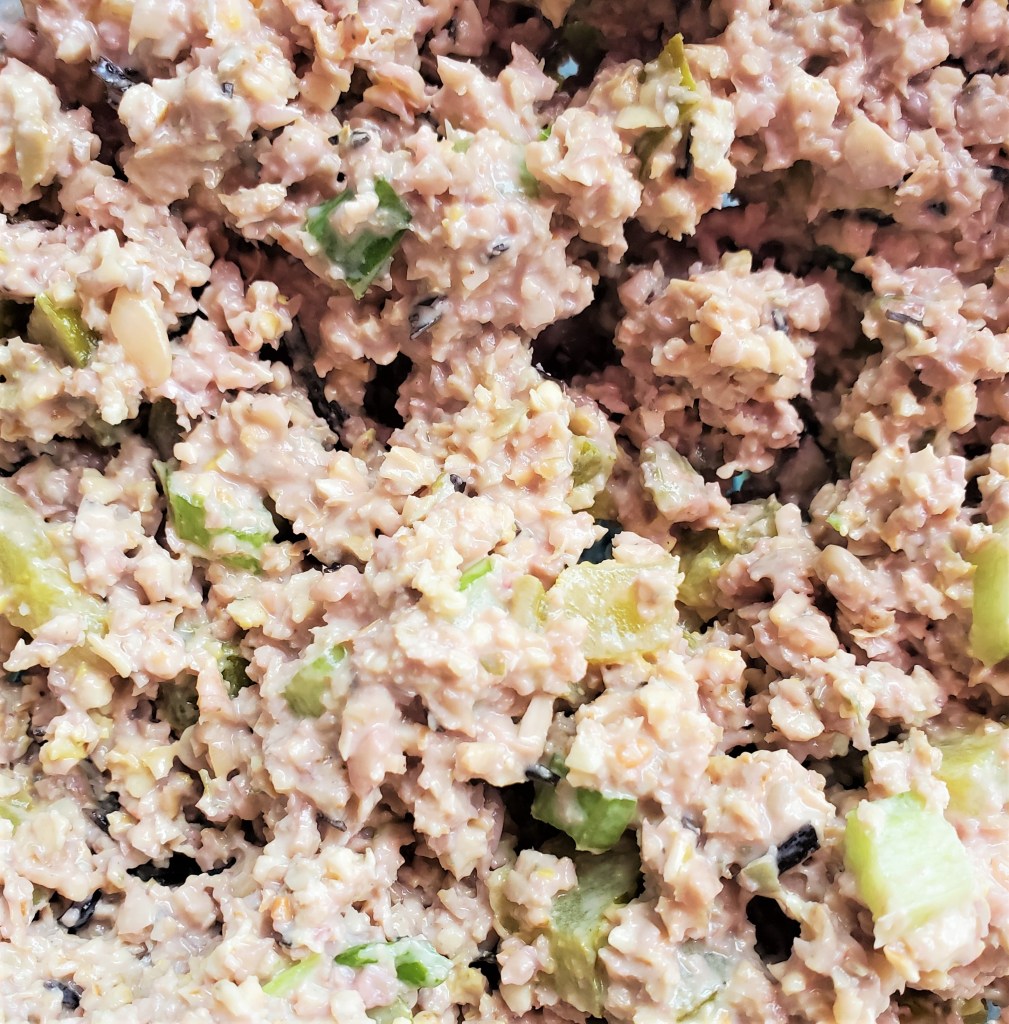
Once the nuts and seeds have soaked, drain off the soaking water. Add the dried seaweed and pulse the nuts, seeds and seaweed until you have a grainy mix. Don’t overmix or you’ll end up with a paste. You want to keep some texture.

In a medium-sized bowl, mix the lemon juice, mayonnaise, pickle brine, horseradish, and chopped celery, green onion and dill pickles. Mix everything together and then stir in the ground walnut, sunflower seed, and pumpkin seed mixture and blend together.

Taste and add salt and pepper if you prefer. I find the pickles and brine make everything sufficiently salty.

Pile the mixture high, higher, higher on bread, toast or even cucumber slices and enjoy!

Kaleslaw – crispy, crunchy, creamy, tangy and chewy

Kaleslaw.jpg

Kaleslaw has been my go-to salad all winter. Thanks to affordable, mixed bags of already shredded kale, cabbage, broccoli and Brussel sprouts, I can make this salad in less than 10 minutes and it will last for several days in the fridge. It also travels well in packed lunches.

For a burst of bright colour and extra nutrients and flavour, I sometimes peel and shred in a raw beet too.

Ingredients

ingredients.jpg

For the salad

4 cups of shredded mixed kales, cabbage, broccoli and Brussel sprouts

1 granny smith apple cored and diced, but not peeled

1 rib of celery sliced

¼ cup raisins (optional)

¼ cup chopped walnuts (optional)

1 raw beet, peeled and shredded (optional)

For the dressing

1/3 to ½ cup vegan mayonnaise

¼ cup plain vegan yogurt

The juice of ½ lemon

1 Tbsp maple syrup

½ tsp salt

1 tsp Dijon mustard

A few grinds of pepper

kaleslaw beets.jpg

Adding a shredded beet gives the kaleslaw extra crunch and nutrients and a gorgeous colour.

Directions

Mix all the dressing ingredients in a medium sized bowl. Add the salad ingredients and toss to combine. This salad is even better if left to sit for an hour or more to let the flavours combine.

kaleslaw super close.jpg

A savoury bread pudding – a luscious side or a decadent dinner

Bread pudding use this one3.jpg

Even in my meat-eating days, my favourite part of a holiday dinner was the stuffing. Just smelling sage and rosemary still takes my mind back to childhood holidays.

Since I wasn’t having any sort of dinner gathering this holiday, I decided to have just stuffing as dinner. With just a few tweaks to my mother’s original recipe, I created this dish which is crunchy, savoury, and full of contrasting textures thanks to the chestnuts, lentils and toasty bread. It can still be served as a luscious side in lieu of potatoes or other starches, or it can be eaten as a main course in its own right with lots of colourful veggies.

The dish is easy and only takes two days to make. Kidding!!! You do need stale bread but if you don’t have two days to let your bread get stale, you can toast it.

Let’s get started.

Ingredients

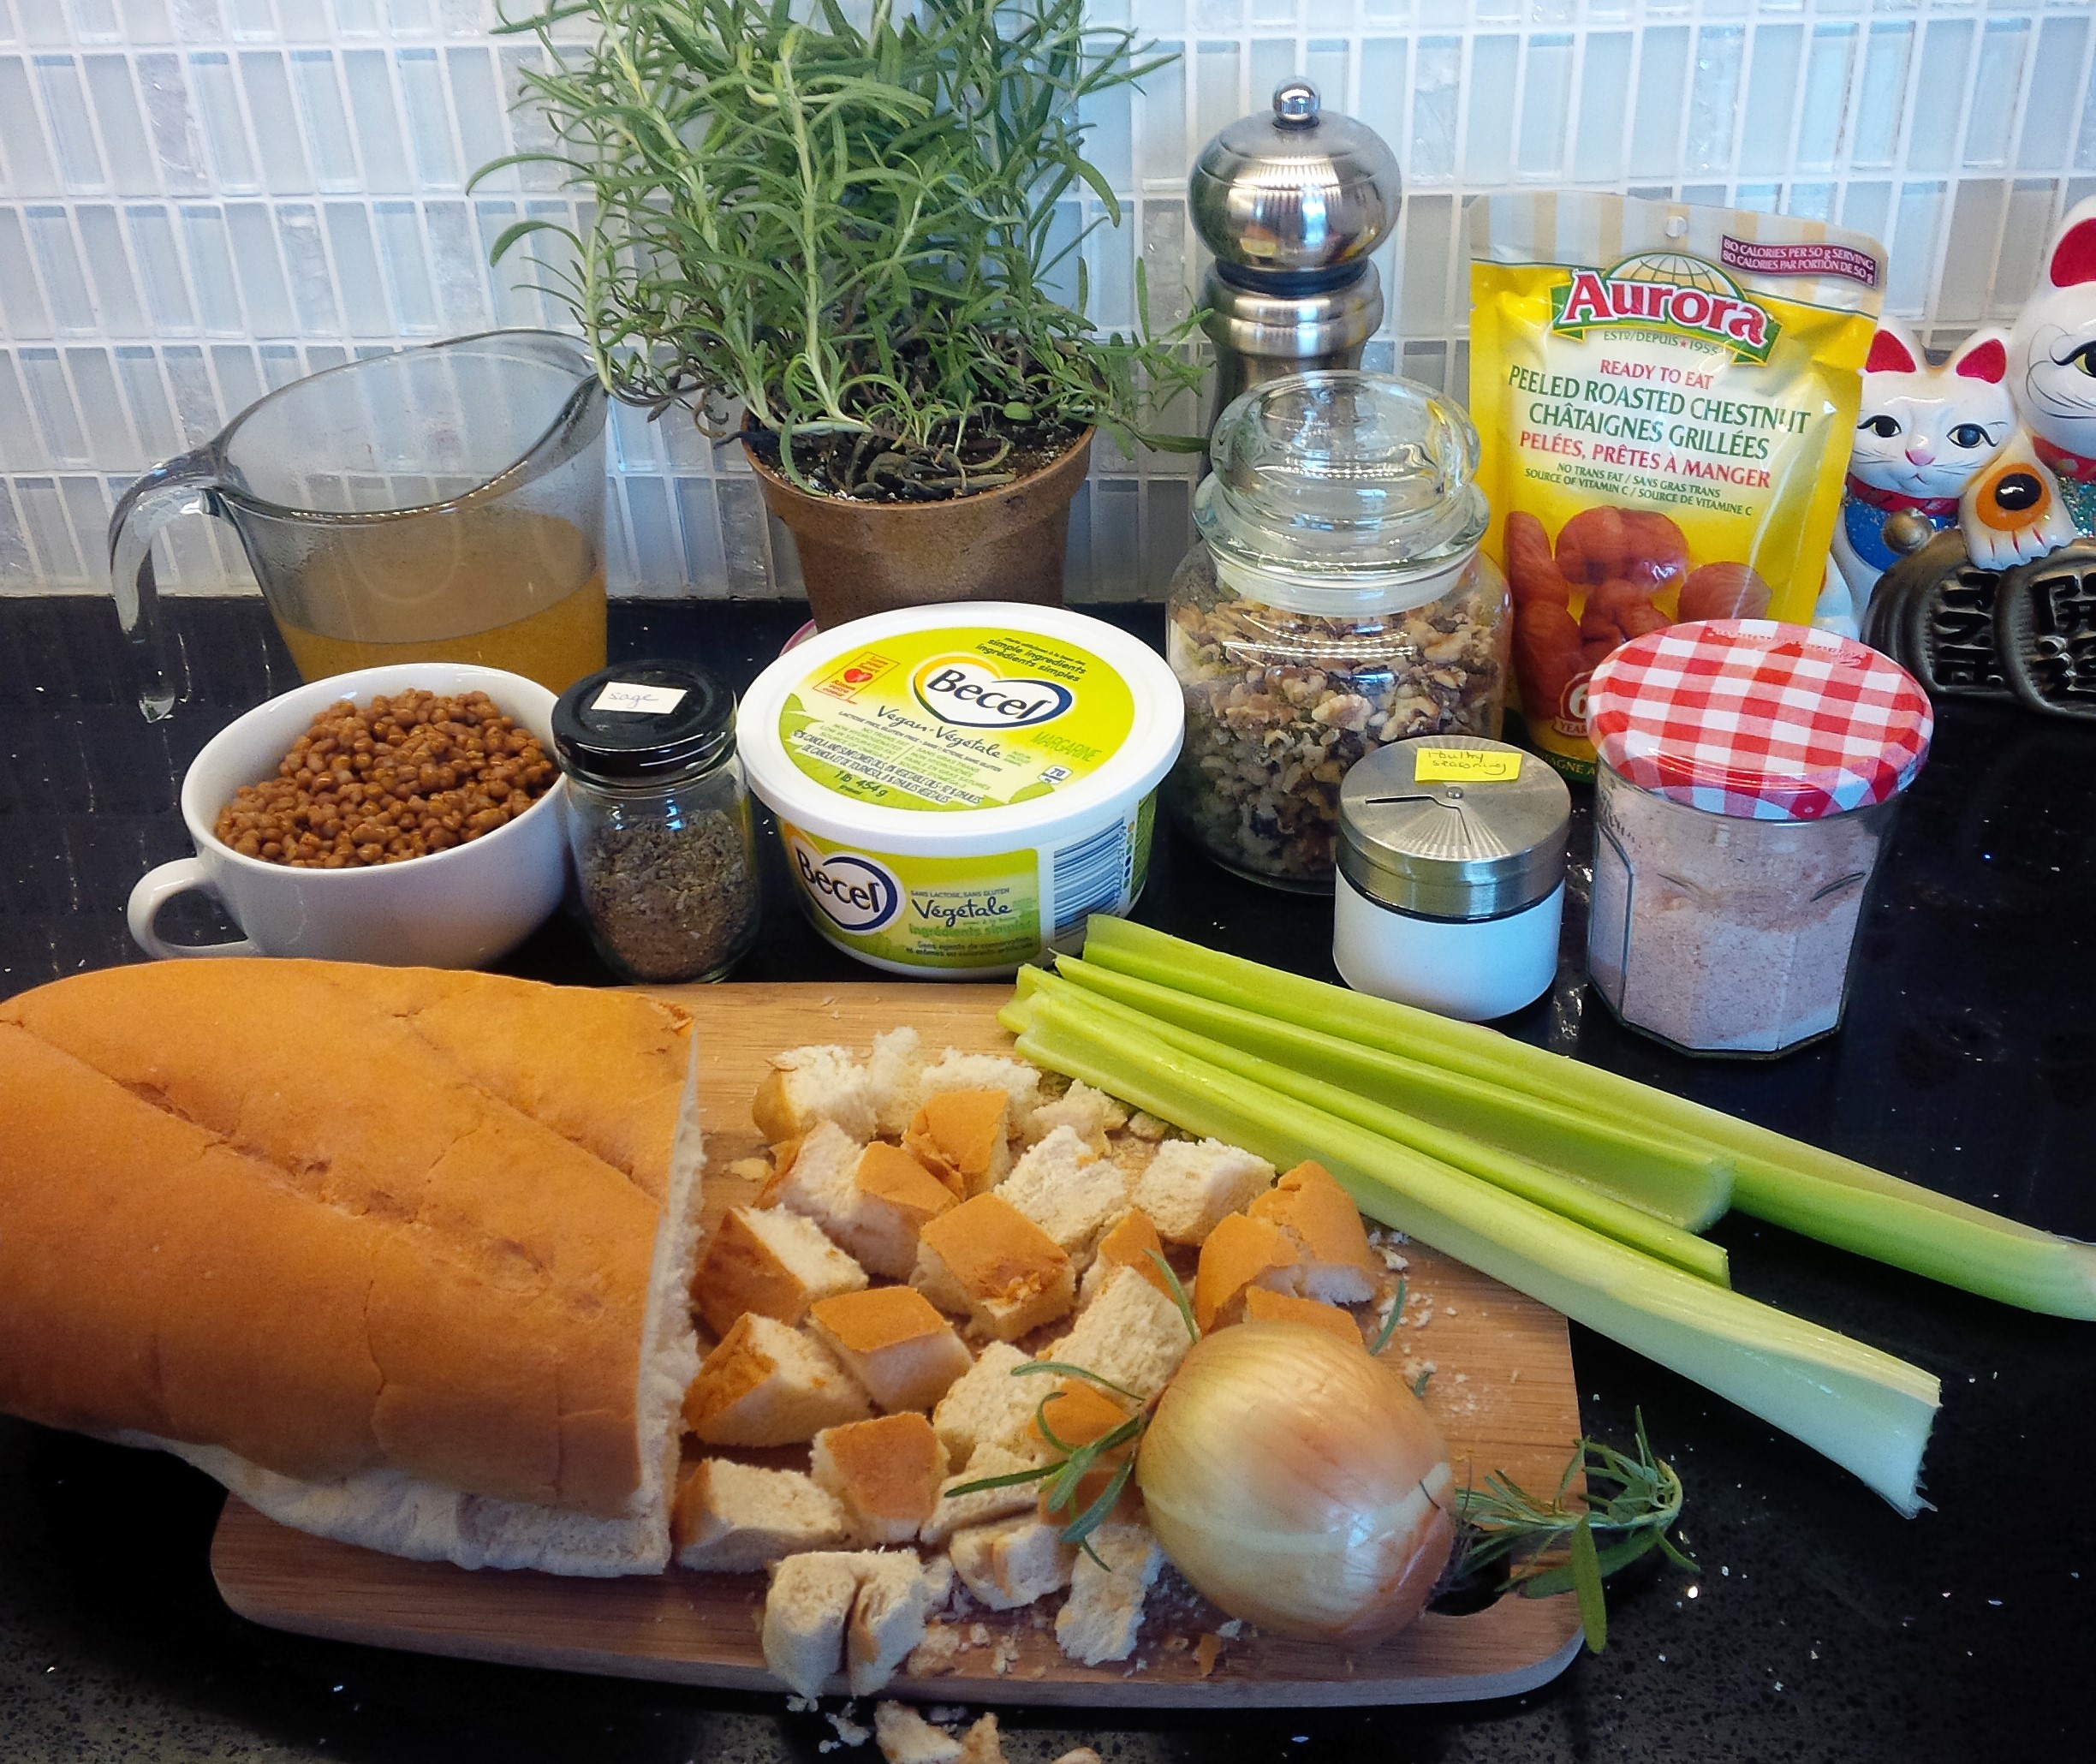
Bread pudding ingredients.jpg

12-14 oz loaf of stale (or toasted) bread – white or whole grain – cut or torn into bite-sized pieces

3 stalks of celery sliced

1 onion diced

1 cup vegetable broth

100 grams roasted, chopped chestnuts (about 9-11 chestnuts)

½ cup chopped walnuts

¾ cup cooked lentils (about ½ a can if you’re using canned).

1/2 cup margarine

3 tsp poultry seasoning

2 tsp dried sage

1 Tbsp fresh rosemary (or 1 tsp dried)

1 tsp salt

Pepper to taste (I use about ½ tsp)

Directions

Preheat your oven to 375 degrees.

In a very large pot combine the margarine, onion and celery. Heat on a medium-high heat and sauté until the onion just starts to soften. Add the poultry seasoning, sage, rosemary, salt and pepper and mix to combine. Turn off the heat. Add the bread, chestnuts, walnuts and lentils and mix with the margarine-onion-herb mixture to coat all the bread. Pour in the broth and stir again to moisten the bread (the bread will not be wetted through).

Spoon this mixture into a 9”x9” baking pan and pat it down so it’s compressed and firm.

Bake for 20-30 minutes, depending on your oven. You want some crunchy crust to form on the top.

Serve immediately with colourful veggies and vegan gravy.

bread pudding meal.jpg

This savoury bread pudding will keep covered in the fridge for 3 days.

The “Oh Hell Yeah!” of Black Bean Brownies


blackbeanbrownie.jpg

Listen, I’m not complaining or anything, but I’m forced to eat an awful lot of amazing vegan food in pursuit of great recipes for this blog. I’m considering renaming this site The Fat Vegan.

Here’s a black bean brownie recipe that’s very closely based on Chocolate Covered Katie’s recipe.

The results are chocolately, dense and fudgy, and deliciously versatile. I’ve had these brownies three different ways. Dusted with icing sugar as shown above.

RaspberryBrownie.jpg

With vanilla coconut ice cream, raspberry coulis and berries.

MapleBBBrownie.jpg

And topped with maple butter and walnuts.

Rough gig. Let’s get baking. You need a food processor for this recipe.

Ingredients

  • 1 1/2 cups cooked black beans (a 15-oz can, drained and rinsed very well)
  • 1/2 cup rolled oats
  • 1/4 tsp salt
  • ½ cup liquid sweetener – agave or maple syrup or even corn syrup
  • 1/4 cup coconut or vegetable oil
  • 2 tsp pure vanilla extract
  • 1/2 tsp baking powder
  • 1/2 cup to 2/3 cup chocolate chips
  • ½ cup walnut pieces (optional)
  • 1 tsp instant coffee granules (optional – but it adds depth to the chocolate flavour). Alternately, you could use 1 tsp balsamic vinegar (trust me on this).
  • 4 Tbsp cocoa powder

Directions

Heat your oven to 350F.

Grease a 9”x 9” pan for thinner brownies or a 8”x 8” pan for a thicker brownie. I used a 9”x 9” for these photos.

Put the rolled oats into the food processer and blitz them until you have a coarse meal. Add the rest of the ingredients except the chocolate chips and walnuts and blitz again until everything is combined. You may need to scrape down the sides once.

Remove the food processor blade. Manually stir in the chocolate chips and walnuts to combine.

Spoon the brownie batter into your greased pan and level out the batter.

Bake for 15-20 minutes. Let the brownies cool before trying to cut them. I like them best of all after they’ve thoroughly cooled – they seem to get even chewier and fudgier!

Get creative with your toppings… or no toppings. I see in my future that I’ll be trying these brownies with cinnamon and cayenne added to the batter. I’ll let you know how that goes.


Chocolate walnut loaf

chocolateloaf

Ah, chocolate. I love it. This beautiful loaf is straightforward, unpretentious and delicious. The recipe is from the cookbook “How it all Vegan” by Barnard/Kramer.

My only changes simplify some of the measurements (do you really need to count out 7 tablespoons of oil when it ½ cup will do the trick?) and to add ½ a cup of vegan chocolate chips, because where chocolate is concerned, more is more.

Ingredients

1 cup plant-based milk (I use unsweetened almond milk)

1 Tbsp apple cider vinegar

2 Tbsp ground flax or chia seeds

6 Tbsp water

1 ½ cups all purpose flour

¾ to 1 cup sugar (make sure you use unbleached or raw sugar, for a vegan cake)*

½ cup cocoa powder

1 tsp baking powder

1 tsp baking soda

½ tsp salt

½ cup oil ( I use melted oil but you could use any flavourless oil)

1 tsp vanilla

½ cup chopped walnuts

½ cup vegan chocolate chips

Directions

Preheat your oven to 350F. Lightly grease a 9-inch loaf pan. Have your pan and your oven ready to go. Once you’ve mixed your batter and the vinegar hits the baking soda and baking powder, the leavening action starts happening and you want this baby in the oven!

Mix the milk, water, vinegar and flax or chia seeds in a small bowl. In a larger bowl sift together the flour, baking powder, baking soda, cocoa and salt. Yes –sift. I am a lazy baker but sifting here is a good idea so you don’t end up with weird, white salty bursts of unincorporated baking soda or baking powder in your finished loaf. Stir these dry ingredients together, then stir in the walnuts and chocolate chips.

Add the milk/water mixture, the vanilla and the oil to the dry ingredients and mix together until you have a  sticky batter. Do not beat or over stir. Pour into the loaf pan and bake for 50-55 minutes. I needed the full 55 minutes in a convection oven.

Let the cake cool for about 15 minutes before removing it from the pan and slicing it.

*What’s the deal with white sugar? About 60% of white sugar produced in North America is whitened by filtering the unrefined sugar through charred animal bones. Ugh. This process doesn’t have to be noted on the sugar packaging. So unless you find white sugar that’s specifically labelled vegan, you’re better off going with unrefined or raw sugar. The taste is exactly the same except you know… no animal bones.

Make room for muhummara – a tangy red pepper and walnut dip

Muhummara 

Muhummara

Move over hummus and make room for muhummara – a savory, almost meaty dip with a slightly sweet tang that makes it gorgeous to eat on endive leaves..

This dish does require a bit of planning. The peppers need time to roast and cool.

2 red peppers

1 cup walnut pieces – toasted

3 cloves garlic

½ tsp cumin

1 tsp red pepper flakes

The juice from one lemon

2 ½ Tbsp pomegranate molasses (find it in the foreign food section of larger supermarkets or in markets specializing in Middle Eastern and/or Halal foods).

3 Tbsp extra virgin olive oil

1 tsp salt

½ cup bread crumbs (I used panko crumbs because vegan bread crumbs can be hard to find…Ryvita crackers can also be turned into excellent, vegan bread crumbs)

¼ cup tomato paste (TIP: buy a large can of tomato paste and dole it out into 2-tablespoon portions onto a wax paper-lined cookie sheet. Place it in the freezer and let the tomato paste dollops freeze ’til solid. Store the frozen dollops in a container and you’ll have tomato paste when you need it with no waste. I/4 cup is 4 tablespoons).

To toast the walnuts: Do this either in a dry frying pan on high heat, shaking constantly because the walnuts will burn in a flash. I prefer to toast my nuts and seeds in a toaster oven at 430F for 5 minutes.

To roast the peppers: remove the stems, cut the peppers in half lengthwise and remove the seeds. Place the peppers cut side down on a cookie sheet and roast at 450 for 10-15 minutes. They should be charred on the outside. Place the still-hot peppers in a paper bag. Roll the bag’s rim to seal it and let the peppers steam. When they’ve cooled down, their charred skins will slide right off. Gosh, doesn’t that sound so evil?

Once you have toasted walnuts and roasted peppers, everything comes together in mere minutes.

Put all the ingredients in a food processor and blend on high until you have a thick dip. You may need to scrape down the sides of the food processor bowl once or twice. You can enjoy the dip immediately or store in the fridge for up to 3 days. I find the muhummara is even better the next day.

Enjoy with endive leaves or crackers or pita bread. SO GOOD and something a little different!

Raw, vegan, carrot cake cupcakes with cashew frosting

September marches on and it’s still hotter than sin. It’s enough that we’re cooking outside; I’m not going to cook inside too. But a gal’s gotta eat. These cupcakes are all raw so require no heat. My carrots this year are especially sweet and juicy; perfect for these delicious treats.

CarrotCake

For the frosting

1 cup raw cashews soaked overnight (8 hours) and drained

1 Tbsp maple syrup

½ Tbsp melted coconut oil

1 tsp vanilla

1 Tbsp lemon juice

½ tsp salt

In a food processor, blend all the ingredients. Spoon the frosting into a piping bag for piping onto the cupcakes. I don’t have a piping bag, so I used a plastic ziplock bag with the corner snipped off to do my piping. You don’t get a fancy result, but you get results. J

For the cupcakes

2 cups shredded carrots

½ cup walnut pieces

½ cup dates, pitted and soaked in hot water for about 15-30 minutes

½ cup raisins (if you don’t like raisins, try diced dried apricot)

¼ cup unsweetened shredded coconut

2 Tbsp maple syrup

1 tsp cinnamon

1 tsp nutmeg

½ tsp ground cloves

Pinch salt

Put the dates, walnuts and maple syrup in a food processor and blend. It’ll look ugly but persevere.

In a large bowl, mix all the ingredients together and then scoop into cupcake liners. Top with the frosting and keep in the freezer. Let thaw about 10 minutes before eating.

I think the cupcakes are delicious on their own without the frosting and could see making these into carrot cake balls rolled in ground walnuts.