Esther’s Chocolate Pumpkin Brownies

Esthers Brownies 3

Here’s a recipe from Esther’s Kitchen (Esther being none other than media phenomena and fashionista Esther the Wonder Pig) that is so easy, versatile and forgiving, I have to share it.

Esther’s chef, Linda, tried these brownies 11 different ways – each way being equally delicious I’m sure.

Then I tried the recipe two more ways. Again, all fabulously delicious!

The best part – you just bung everything into a food processor or mixing bowl and hand mix, then pour the batter into a parchment-lined pan and bake. You end up with dense, moist, chocolatey and spicy brownies that satisfy.

Here’s Esther’s Kitchen’s original recipe post:

This recipe has been tested using the following choices: almond butter, peanut butter, sunflower butter, agave nectar, brown rice syrup, maple syrup, dairy-free butter, coconut oil, almond flour, all purpose flour and gluten-free baking flour blend. Each one tasted great and had unique flavors. All of the ingredients resulted in a moist brownie that held together well. The brown rice syrup had the least amount of sweetness. This batch was baked with almond butter, almond flour, coconut oil and agave.

Esther’s Pumpkin Brownies

Cuisine: Esther Approved Dessert, Baked Good, Gluten-free and Nut-free options

Prep Time: 10 minutes Bake Time: 25 minutes Cool Time: 15 minutes Yields: 12 (3”x3”) brownies

By: Chef Linda | Esther’s Kitchen

Ingredients

  • 1 cup pureed pumpkin from a 15 oz can or homemade and excess water drained
  • 1/2 cup creamy almond, peanut or seed butter (almond was used)
  • 2 Tablespoons softened coconut oil
  • 1/2 cup agave nectar, maple syrup or brown rice syrup (agave was used)
  • 2 teaspoons vanilla extract
  • 1/2 cup unsweetened cacao/cocoa powder
  • 3/4 cup flour of choice: almond, gluten free baking blend or all purpose (almond was used)
  • 1-1/2 teaspoons pumpkin pie spice
  • 1/2 teaspoon sea salt
  • 1 teaspoon baking soda
  • 1 teaspoon apple cider vinegar Instructions

Directions

1. Preheat the oven to 350°F.

2. Line an 8“ x 8“ baking dish with parchment paper. Press the paper alond the bottom edge and all 4 corners; set aside.

3. Combine all of the ingredients in a mixing bowl or food processor. Use an electric hand mixer or process in the food process until the batter is smooth.

4. Pour all of the batter in the center of the parchment lined baking dish. Scrape out remaining batter from the bowl or food processor. Spread the batter into the corners until you have a level surface.

5. Bake the brownies for 25 minutes. Cool the brownies on a metal rack for 15 minutes.

6. Pull up two sides of paper and lift the brownie out of the pan. Place the paper and brownie on a cutting board. Slice the brownie into 9 pieces or as desired.

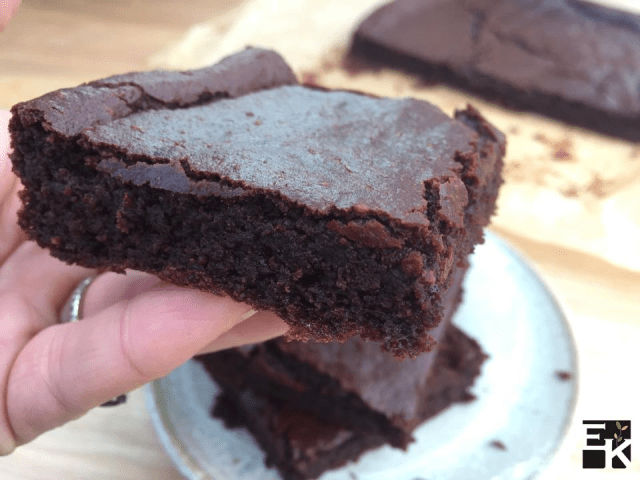
Here’s what Chef Linda’s brownies look like.

Esther brownies

I hope you give this amazingly versatile recipe a try and make it your own! The key is to know where you can make swaps:

  • the type of flour
  • the type of oil
  • the type of nut/seed butter
  • the types of sweetener, and
  • the spices.

You can also try add ins such as chocolate chips, walnuts or pecans, even diced candied fruit.

Just do not mess with the proportions of ingredients because that’s where the chemistry is.

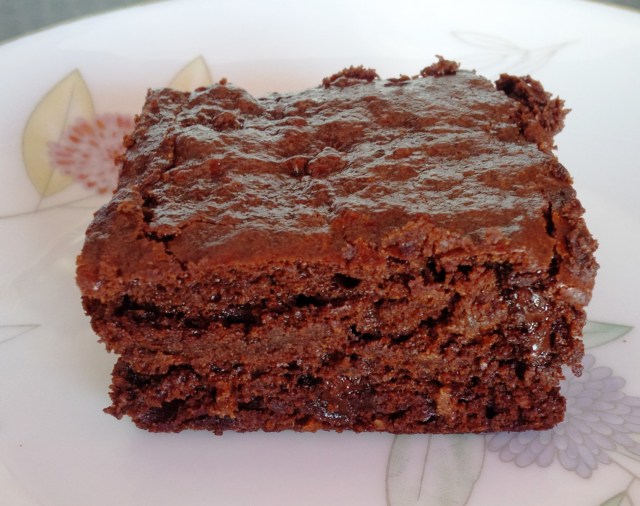
Here’s one of my versions:

I used, pumpkin, regular flour, a mix of maple syrup and agave, coconut oil, tahini paste instead of a nut butter, and added a cup of chocolate chips and a big pinch of cayenne pepper. This batch was made in the food processor.

Esthers Browniew mine

For my next batch, I diverged and used: mashed banana and no pumpkin, regular flour, the full amount of coconut oil, almond butter, maple syrup only 1 teaspoon of pumpkin pie spices, ½ teaspoon cinnamon and ½ teaspoon cardamon. I also added a cup of chocolate chips because it’s chocolate and more is more.

Esthers Brownies 3

Why are you still reading? Go make some brownies!!


Vegan pumpkin risotto

squashrisotto

Oh, this dish just oozes comfort and joy for the fall and winter season. It’s creamy, sweet, satisfying and impresses the heck out of people you serve it to.

So, think your risotto won’t be any good without cheese or butter? Try this!

If you have 30 to 90 minutes you have time to make this dish and wow yourself and a friend. The risotto takes just 30 minutes to make, but you do need about 40 minutes to roast the pumpkin or squash, which you can do the day before.

Making risotto is a bit of an exercise in faith. You just have to believe it’s going to work because halfway through the process, the pan will look like a messy failure. But it always turns out.

This recipe makes 2 generous servings or 3 appetizer size servings.

Ingredients

1 cup Arborio rice (must be Arborio rice)

3 cups vegetable broth

1 Tbsp olive oil

1 Tbsp vegan margarine

1 large shallot finely minced (or 1 clove garlic minced and ½ onion minced)

1/3 cup (or so) of dry white wine (optional – but it’s an excuse to crack open the wine!)

½ tsp cumin

I small pumpkin or squash. I love thin-skinned heirloom squashes that don’t need to be peeled. For this recipe I used a honeynut squash.

3 Tbsp nutritional yeast

1/2 to 1 tsp ground black pepper

1 -2 cups fresh spinach chopped finely.

squashrisotto2

Directions

Prepare your squash. Heat your oven to 400F. Wash the squash and cut it in half. Remove the seeds and place the squash halves on a cookie sheet cut side up. Drizzle the squash with olive oil and sprinkle with salt. Roast the squash for 40 minutes until it’s fork tender and golden brown in spots. Remove from the oven and let the squash cool. If you’re using a thin-skinned squash, just cube the squash. If you are using any other type of squash, remove the skin and then cube the vegetable.

Heat the broth in a saucepan so it’s at a low simmer.

In a large frying pan or skillet, heat the olive oil and margarine.

Add the shallot (or onion and garlic, if that’s what you’re using) and sauté until translucent.

Add the rice and stir until it’s coated with the margarine and shallots and turning a light golden colour.

Add the cumin and the white wine (if using) and stir together.

Now the magic. This step will take about 20 minutes.

One ladle at a time (about ½ cup), add broth to the pan of rice.

Stir the rice until the broth is all absorbed by the rice. At first the rice will quickly absorb the broth and at the same time it will release its starch, creating a creamy base. As the rice cooks, the broth will absorb more and more slowly. Patience. Listen to music. Ladle. Stir. Ladle. Stir.

In about 20 minutes your rice will be done and all your broth should be used up. The rice will be al dente. Stir in the nutritional yeast.

Stir in the chopped spinach and the cubed, cooked squash and stir together. Serve up and enjoy!


Pumpkin zucchini bread

PumpkinbreadI make this bread or variations of it almost every week to have for breakfast. This is a quick bread, but it’s not sweet. It’s intended to be eaten with a nut butter or nut cheese.

This bread is super simple to make and versatile. I’ve substituted applesauce or mashed banana for the pumpkin and mixed up what other fruits and nuts I add. Use your imagination; just don’t mess with the chemistry – the basic mix of flours, baking soda and milk!

Lately I’ve been adding chickpea flour (a/k/a besan or gram flour) to amp up the protein content.

Ingredients

Dry ingredients

2/3 cup regular flour

1/3 cup chickpea flour

½ cup cornmeal

1 tsp baking soda

2 Tbsp chopped walnuts

1 Tbsp pepitas (shelled pumpkin seeds)

1 Tbsp raisins

1 tsp cinnamon

½ tsp allspice

½ tsp cloves

Wet ingredients

1 cup plant milk

1 tsp vanilla

¼ cup molasses

½ – 2/3 cup pureed fruit (in this case pumpkin, but try apple sauce or mashed banana)

½ cup fresh fruit (e.g. here I used grated zucchini, but try berries, diced apples or pears etc)

Directions

Preheat the oven to 350. Grease a loaf pan.

In a large bowl, mix the dry ingredients together.

In a smaller bowl, mix the wet ingredients together.

Pour the wet ingredients into the dry ingredients and mix to incorporate but no need to mix well. Pour into the loaf pan and bake for 45 minutes. A fork inserted in the loaf should come out clean.

TIP: Pumpkin tends to come in big cans. I dole out 1/2 cup portions of pumpkin in freezer bags and store it in the freezer for up to 4 months. This way, you waste nothing and always have pumpkin when you need it. Ditto zucchini – that grated zucchini in this loaf is from September’s harvest.