Red lentil dal – dishing up some red hot love

redlentildal

I love Indian food, and lucky me, I got to spend a month in the south of India partaking of some of the best Indian meals any person has ever enjoyed.

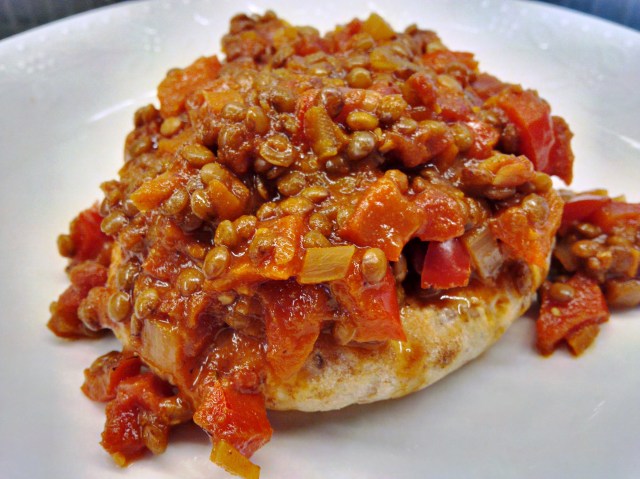
This recipe for red lentil dal is highly westernized but no less flavourful and nourishing than the more exotic originals. What it is though, is faster to make using ingredients that are readily available in North America and Europe. Don’t let the long list of ingredients deter you – it’s mostly spices you likely already have in your cupboard.

Ingredients

2 cups red lentils

1 Tbsp coconut oil (or olive oil)

1 large onion diced

2 Tbsp curry paste (I use Thai Kitchen brand)

1 heaping Tbsp curry powder

1 tsp ground turmeric

1 tsp cumin

1 tsp chili powder

1 tsp salt

1 tsp sugar

3-4 cloves garlic minced

1 tsp ground ginger

1 tsp sambal oelek (chili paste)

½ tsp ground cinnamon

¼ tsp ground cloves

397 ml can tomato paste (13.5 oz)

1 cup chopped spinach (optional)

2 tomatoes diced

Directions

Cook the lentils. You need 4 cups of liquid. I use a mix of vegetable broth and water. You can use just water or all vegetable broth. Bring the lentils and liquid to a boil, then reduce to a simmer and simmer covered. The lentils will only take about 15 minutes to cook. There may be a tiny amount of liquid in the pot and that’s okay. Set aside.

In a large pot, melt the coconut oil. Add the diced onion and cook on medium-low heat for about 15 minutes, stirring often, until the onions are golden.

Add all the spices and seasonings: curry paste, curry powder, cumin, tumeric, chili powder, sambal oelek, garlic, sugar, salt, cinnamon, cloves and ginger and heat through combining with the onion. Add the chopped tomato and combine. Add the tomato paste and spinach and combine. Last, add in the cooked lentils and mix everything together.

Serve with basmati rice, samosas and chapati bread. Mmmmm.


Mango coconut quinoa

MangoQuinoaSalad.jpg

This dish is so simple and easy yet tasty beyond belief. It has it all – chewy, crunchy, savoury, sweet and loaded with nutrients to fuel you through the day. It’s also one of my favourite lunches to tote to work.

Ingredients

1 cup uncooked quinoa

1 mango – peeled and diced

1 red pepper – diced

¼ cup unsweetened shredded coconut

½ cup fresh or frozen edamame (let the edamame thaw if you use frozen)

1/3 cup almond slivers toasted

1/3 cup diced onion (red onion makes for a prettier salad)

The zest of two limes

¼ cup balsamic vinegar*

2 Tbsp chopped fresh cilantro (optional)

MangoQuinoaSaladClose.jpgDirections

Rinse and cook the quinoa in 2 cups of water. When the quinoa is cooked, fluff it with a fork and let it cool. You can do this step ahead of time – even the day before.

Toss all the ingredients together in a large bowl. I like to let the dish sit for an hour in the fridge to let the flavours blend before serving.

Makes 4 meal-size servings.

*I have a coconut balsamic vinegar that I used in this recipe. If you’re into flavoured vinegars, this is a great dish to experiment with some of the different flavours.

Real vegans fake it – rice paper bacon

FakeBacon.jpg

So my Facebook friend, Bob Kurtz, casually mentions to me in a chat “Have you tried rice paper bacon yet?” No, I had not. But once Bob showed me this video and pictures of his own creations, I was IN!

This is faux bacon made from rice paper and marinade. It’s ridiculously easy to make, inexpensive, tasty, crispy and gives you the salty, smoky, chewy flavour which is what any sane human is actually craving when they think they want bacon.

I googled a few different ways to make this bacon and this is my version.

Ingredients

8 sheets of rice paper

6 Tbsp nutritional yeast (Bob grinds his in a coffee grinder to get a fine powder)

2 Tbsp neutral tasting oil like canola oil

3 Tbsp soya sauce

½ tsp liquid smoke

½ tsp maple syrup (Bob and I both agree on this)

A pinch of smoky paprika

FakeBacon2.jpg

Directions

Heat your oven to 400F. Line a baking sheet with parchment paper.

Combine all the ingredients except the rice paper in a small bowl. Add about 2 Tbsp water to get a gravy-like consistency.

Cut your rice paper into strips about 1” wide. I had difficulty cutting the dry rice paper without it snapping so I took two sheets at a time and quickly ran them under tap water and cut them while damp.

When you have your strips cut in a double thickness (see video again), dip them in water once more, use your fingers like a squeegee to slip off the excess water and then coat them in your marinade.

Place each strip on your parchment lined pan.

Bake for 8-10 minutes at 400 degrees. Watch them. Just like pig-bacon, they can go from crisp to burnt quickly.

Bob fries his bacon as per the video and also lets it cool off on a baking rack so that that his strips have the classic wavy ripple to them.

I want to have breakfast with Bob some day.

Refried beans and rice – casserole style!

MexicanDogFoodPiece.jpg

Beans and rice are such an easy, affordable and comforting meal. Here’s my casserole version that everyone loves. This dish comes together quickly and is easy and no fail. It freezes well and is just one of those friendly, favourite recipes that you’ll be so glad you invited into your kitchen.

Ingredients

1 cup brown rice

1 cup jarred tomato salsa – whatever brand and heat level you prefer

3 cups fresh spinach

400ml can refried beans

½ cup pickled jalapenos – optional but I love the heat!

½ cup shredded vegan cheese. I use Daiya mozzarella or cheddar style cheese.1

½ cup corn – fresh, frozen or canned as you prefer

1-2 Tbsp chili powder

½ tsp oregano

¼ tsp basil

½ tsp cumin

¼ tsp ground pepper

½ to 1 tsp salt (to taste)

MexicanDogFoodWhole.jpg

Directions

Place the rice and 2 cups of water in a covered saucepan and bring to a boil. Reduce to a simmer and let simmer for about 25-30 minutes or until the water is all absorbed. Add the salsa to the cooked rice and stir to combine.

Preheat your oven to 350F.

Grease a casserole dish.

Mix the refried beans, the seasonings and corn in a bowl.

Layer half the rice-and-salsa mixture in the bottom of the casserole.

Add the spinach on top in a layer and tamp down. Add the refried bean mixture on top and smooth out. Scatter the pickled jalapenos on top, if using. Place the remaining rice-and-salsa mixture on top and smooth out. Sprinkle the shredded cheese on top. Bake for 30 minutes. Let cool slightly before serving. This dish makes 4 servings.

P.S. Okay, I’ll confess now…. I secretly call this dish Mexican dog food because while it’s delicious it never looks too pretty on the plate. So go ahead, fill up your plate, add some natchos, bark at the neighbours and eat up!


Fettuccini Alfredo – the best vegan recipe of all time

FettuciniAlfredo.jpg

Okay. Ready? This is it. The best vegan recipe ever. Ever.

It’s easy, simple, fast, no-fail and delicious. Luckily for me it was also one of the first vegan recipes I ever tried and still my favourite.

Make this dish and thank me later for spreading the joy.

The recipe comes from Deborah Gleason, Esther the Wonder Pig’s first chef.

Ingredients

12 to 16 oz pasta – I use spaghettini because it cooks in six minutes. If you use less pasta, you have a saucier dish, which suits me just fine.

2-3 cloves garlic

½ cup raw cashew pieces

3-4 Tbsp nutritional yeast

1 ½ to 2 tsp sea salt (I use 2 teaspoons because I don’t salt my pasta water)

A few grinds pepper

387ml can coconut milk

Directions

This recipe takes as long to make as it takes to cook your pasta. Seriously. That’s what? 10 minutes max., right?

Cook your pasta according to the package directions. Drain and put in a large serving bowl.

While the pasta is cooking, put all your other ingredients in a blender. Blend until you have a creamy sauce. Pour over the hot pasta, toss to combine and serve. That’s it.

Taste and swoon.

I love this dish served with broccoli and green peas on the side or stirred right in.

Cauliflower Chickpea Curry with Coconut and Sweet Potatoes

CauliflowerChickpeaCurry.jpg

Here’s a fragrant, flavourful curry that is just as delicious in summer as it is in winter. For winter cooking, I use frozen cauliflower, which is both affordable and appealing to lazy cooks like me.

There’s a little bit of chopping, a few cans to open and then all you have to do is let the curry cook itself. Easy!

Ingredients

1 Tbsp coconut or olive oil

1 onion diced

1-2 cloves garlic minced

1 red chili minced – see TIP below

1 Tbsp grated ginger root OR 1 teaspoon powdered ginger

1 Tbsp garam masala

½ Tbsp curry powder

1 ½ cups cooked chickpeas (that’s one 15 oz can drained and rinsed)

2 cups canned or boxed tomatoes (If you have any leftover tomatoes, just freeze them in a freezer bag).

1 sweet potato peeled and diced

2 cups cauliflower cut into florets

1 can coconut milk (397 ml or 13 oz)

1/3 cup vegetable broth (optional)

1-2 teaspoon salt (depending on your tomatoes and tastes)

1 cinnamon stick

1 lime leaf – see TIP below

1-2 cups chopped spinach – see TIP below

Directions

Heat the oil in a large pot or Dutch oven. Add the garlic, chili, onion and grated ginger, if using. Sauté until the onion is soft. Add the garam masala and curry and powdered ginger if using and stir to coat the onion/garlic mix and let the spices heat through.

Add all the other ingredients except the spinach and stir to combine. Bring to a boil, and then reduce to a simmer. Let simmer for 40 minutes. Add the spinach in the last few minutes of cooking.

Fish out the lime leaf and cinnamon stick.

I love this dish served over rice, especially jasmine rice. Enjoy!

CauliflowerChickpeaCurry2

TIP – This recipe is a study in foods you can keep in your freezer so you always have them handy.

I buy my red chilies in bulk and then freeze them in a freezer bag. They’ll last for months in the freezer and are much easier to mince or grate frozen than they are to chop fresh.

If you have leftover fresh spinach or kale, throw it into a freezer bag and store it in the freezer. When I need a cup or two of spinach/kale for a cooked recipe like this, I just crush the greens before adding them to my recipe. There’s no chopping involved and I always have greens on hand for soups, stews, even omelettes.

I buy my lime leaves at an Asian grocery. They come in a bag with a couple dozen leaves in them – far more than is ever needed for any one recipe. The grocer told me to freeze the leftover leaves and use them as needed. Works perfectly!

You can always store other leftover fresh herbs (Do you ever use a whole bunch of cilantro because I don’t!) in freezer bags and then use the frozen herbs as you would fresh ones in stews and sauces and even salad dressings. As with the spinach or kale, you won’t even need to chop – just crumble the frozen herbs. Frozen herbs do not work well as garnishes.

The “Oh Hell Yeah!” of Black Bean Brownies


blackbeanbrownie.jpg

Listen, I’m not complaining or anything, but I’m forced to eat an awful lot of amazing vegan food in pursuit of great recipes for this blog. I’m considering renaming this site The Fat Vegan.

Here’s a black bean brownie recipe that’s very closely based on Chocolate Covered Katie’s recipe.

The results are chocolately, dense and fudgy, and deliciously versatile. I’ve had these brownies three different ways. Dusted with icing sugar as shown above.

RaspberryBrownie.jpg

With vanilla coconut ice cream, raspberry coulis and berries.

MapleBBBrownie.jpg

And topped with maple butter and walnuts.

Rough gig. Let’s get baking. You need a food processor for this recipe.

Ingredients

  • 1 1/2 cups cooked black beans (a 15-oz can, drained and rinsed very well)
  • 1/2 cup rolled oats
  • 1/4 tsp salt
  • ½ cup liquid sweetener – agave or maple syrup or even corn syrup
  • 1/4 cup coconut or vegetable oil
  • 2 tsp pure vanilla extract
  • 1/2 tsp baking powder
  • 1/2 cup to 2/3 cup chocolate chips
  • ½ cup walnut pieces (optional)
  • 1 tsp instant coffee granules (optional – but it adds depth to the chocolate flavour). Alternately, you could use 1 tsp balsamic vinegar (trust me on this).
  • 4 Tbsp cocoa powder

Directions

Heat your oven to 350F.

Grease a 9”x 9” pan for thinner brownies or a 8”x 8” pan for a thicker brownie. I used a 9”x 9” for these photos.

Put the rolled oats into the food processer and blitz them until you have a coarse meal. Add the rest of the ingredients except the chocolate chips and walnuts and blitz again until everything is combined. You may need to scrape down the sides once.

Remove the food processor blade. Manually stir in the chocolate chips and walnuts to combine.

Spoon the brownie batter into your greased pan and level out the batter.

Bake for 15-20 minutes. Let the brownies cool before trying to cut them. I like them best of all after they’ve thoroughly cooled – they seem to get even chewier and fudgier!

Get creative with your toppings… or no toppings. I see in my future that I’ll be trying these brownies with cinnamon and cayenne added to the batter. I’ll let you know how that goes.


Chewy chocolate-coconut bites

ChocolateCoconut

If you like chewy, sweet coconut treats combined with chocolate, then this is the recipe for you! Taste, texture and the tropics come together for delicious vegan treat that’s quick and easy to make. The hardest part is waiting for the chocolate to set.

Ingredients

2 cups shredded, unsweetened coconut

¼ cup coconut oil, melted

¼ cup agave nectar

¼ teaspoon salt

1 cup vegan chocolate chips or other dark vegan chocolate (Remember to buy fair-trade chocolate. Child slavery should not be involved in a compassionate diet!)

Directions

Line a 9”x 5” dish or pan with wax paper.

In a blender or food processor (my ancient blender did the trick just fine), combine all the ingredients except the chocolate. Grind together until you have a chunky paste. This can take a couple minutes. You still want some coconut-y texture.

Spoon the mixture into your wax-paper-lined container, smooth it out and pop into the freezer to let it harden.

While the coconut mixture is cooling, get your double boiler ready for melting your chocolate.

I highly recommend the double boiler method over using the microwave since it’s waaaaay too easy to burn your chocolate in the microwave. I’ve done it. I’ve had chocolate so hot it’s eaten a hole in my microwave-safe dishes.

If you don’t have a double boiler, you can make one. Simply heat a couple inches of water in a saucepan and bring to a boil. You can switch the heat off or reduce to simmer when the water is boiling. Place your chocolate chips/pieces into a metal or heat-proof glass bowl that is big enough to sit on top of the saucepan of water (not in the water). Stir constantly as the chocolate melts.

When you chocolate is melted, pour it over the coconut mixture and smooth out. Return the dish to the fridge and let the chocolate harden. That takes about 1 hour.

If you can, cut into the chocolate coconut mix into squares, or just break cut into bite size pieces… I find a good-quality chocolate has so much snap, it will cut itself however it pleases.

Dig in and enjoy! Maybe even share.

Lentil sloppy joes

SloppyJoe


When I was a kid, sloppy joes were a really big deal for lunch or dinner. Making them involved nothing more than ground beef and a can of Manwich sauce. I shudder to think of it now. These sloppy joys, on the other hand, are something to get excited about. They’re tangy with a hint of sweetness. The lentils are chewy and satisfying and the whole dish – never mind that long list of ingredients, almost all of which you probably have in your pantry already – comes together easily. And…. these joes are great for your body. They’re loaded with iron, fibre, protein and vitamin C.

Ingredients

1 cup of dried Du Puy lentils (or black lentils a/k/a beluga lentils). You want a smaller lentil that needs no presoaking and cooks quickly

1 medium carrot finely minced

1 stalk celery finely minced

1 Tbsp olive oil

1 red or green pepper diced

1 onion diced

1 clove garlic minced

2 tsp chili powder

½ tsp smoked paprika

2 tsp dry mustard

15 oz can (541 ml) diced tomatoes

3 Tbsp tomato paste

2 Tbsp maple syrup or brown sugar

½ to 1 Tbsp sriracha sauce (optional)

1 Tbsp prepared mustard

2 Tbsp ketchup

2 Tbsp A-1 sauce (a/k/a brown sauce)

1 Tbsp apple cider vinegar

1 tsp sea salt (adjust according to how much salt is in your tomato paste and diced tomatoes)

¼ tsp ground black pepper

1/3 cup vegetable broth

Toasted bread or buns for serving. This recipe makes 4 generous servings.

Directions

Put the lentils, diced celery and carrot and 2 cups of water in a small pot. Bring to a boil then reduce to a simmer and let simmer for 15 minutes. The lentils will be chewy but still firm and most of the water will be absorbed. Set aside.

Heat the oil in a large sauce pan. Add the onion and red or green pepper and sauté for about 5 minutes until the onion is translucent. Add the garlic and dry spices and stir together, letting the spices heat through. Add all the remaining ingredients, including the saucepan of lentils (do not drain!) to the large sauce pan. Stir everything together to combine and bring to a boil. Reduce the heat and simmer uncover for 15 to 20 minutes depending on how saucy you want your sloppy joes to be. I cooked mine for 20 minutes.

Serve over toasted bread, buns or fat pitas (as I did). This dish is even better the next day and freezes well for up to 2 months.

Easy 3-cheesey and veggie lasagna

lasagna

Can you believe this is the first lasagna I ever made? And I had the audacity to do it without a recipe. I think you can’t help but get crazy-good results when pasta, cheese and spaghetti sauce are involved.

Remember that I am a lazy cook so even though I made two of the cheeses in this recipe (the third is Daiya mozzeralla-style shreds), the whole recipe is easy and fail proof. I don’t like to waste time or food or money.

I made the nut-based mozzarella and the tofu-based ricotta the night before just to make Sunday morning assembly easier.

Tofu ricotta cheese

Ingredients

12 oz block firm tofu

2 tsp dried oregano

2 tsp dried basil

1-2 cloves garlic minced

1 teaspoon salt

A few grinds of pepper

1 Tbsp lemon juice (about 1/3 of a lemon)

1 Tbsp nutritional yeast

¼ cup raw cashews soaked for a few hours and drained (optional but lovely)

Directions

Put everything in a food processor and pulse until the ingredients are all incorporated and look like stiff paste. If you don’t have a food processor, you can use a blender or just dig in with a fork and get mashing and blending. I’m lazy… I used the blender because it’s easier to clean!

 Mozzerella cheese

Ingredients

¼ cup raw cashews soaked for about 4 hours or longer and drained

1 cup of hot water

2 ½ Tbsp tapioca flour

I Tbsp nutritional yeast

1 tsp salt

1 tsp lemon juice or cider vinegar

Directions

Put everything into a blender and blend until creamy.

Pour into a small saucepan on medium heat. Heat and stir. The mixture will start to curdle (the way scrambled eggs do) and then become thick and look like thick melted cheese. The process takes about 5 minutes. Let the mixture cool and then use in lasagnas, on pizzas or broiled on French onion soup. This mozzarella will store in the fridge for a few days. Some water may separate out of it, if you store it. Just drain that water off.

 The rest of the lasagna

Ingredients

12 oven-ready lasagna noodles – the kind that you don’t need to boil first

2-3 cups of fresh spinach washed and chopped

1 small zucchini cut into ½ moon slices

1 cup of sliced mushrooms

2 ½ cups spaghetti sauce (honestly, I used canned)

1 cup shredded Daiya mozzarella cheese (or other shredded vegan cheese)

Directions

Preheat the oven to 350F.

Okay – do not be daunted by these instructions. All you are doing is creating layers of noodles, ricotta/mozzarella, veggies and sauce. Just do that and it’s all good. My instructions are written to ensure you have enough of everything to get you to the top saucy layer!

Spread about ¼ cup spaghetti sauce on the bottom of a large ovenproof baking dish (my Pyrex dish is 16”x8”x2”).

Place a layer of 4 noodles – overlapping if necessary. Top with ½ of the tofu ricotta. I find the ricotta is thick so I dolloped it across the noodles as evenly as possible. Sprinkle the shredded spinach and sliced mushrooms on top. Spoon 1/3 of the remaining spaghetti sauce over top – again, it doesn’t have to cover the whole thing evenly. Add another layer of 4 noodles. Top with the remaining ricotta cheese mixture. Sprinkle the sliced zucchini on top. Add 1/3 of the mozzarella cheese in dollops. Spoon half of the remaining spaghetti sauce on top. Add the final layer of 4 lasagna noodles. Top with the remained spaghetti sauce as evenly as possible. Dollop the remaining mozzarella cheese on top.

Cover the lasagna with foil and bake for 30 minutes. Take the lasagna out of the oven. Remove the foil and sprinkle the Daiya mozzarella cheese on top. Return to the oven and bake for another 15 minutes.

Let the lasagna rest for about 5-10 minutes before cutting and serving. Enjoy!